I’ve had a home studio for several years. But it was the process of building a new semi-custom home a couple of years back that enabled me for the first time to have a fully dedicated studio space, rather than carving out a corner of a shared space as I’d done in the past.
Since moving in, I’ve found myself constantly revisiting the optimal way to configure and equip the space to maximize workflow efficiency and productivity. While not everyone might enjoy the luxury of a dedicated studio space, I’ve collected a grab bag of ideas for this article that I think will be worth considering for any producer working in a home studio of any shape or size. These ideas have been helpful for me — hopefully, they will be for you as well.
Monitor Controller
If there’s one thing I’ve learned over the years about ensuring a decent mix, it’s listening to my work in a variety of settings, across a range of output methods. When I think I’ve got it about right in the studio, I listen in multiple cars, with cheap headphones, with high-end headphones — in short, across everything I can.
But getting it right in the studio is the first challenge, and it’s essential to start your work there by having not just a single set of studio monitors, but either a second set of them, or perhaps a decent set of computer speakers as a secondary option. But the only way to make such a set-up truly viable is with a monitor controller.
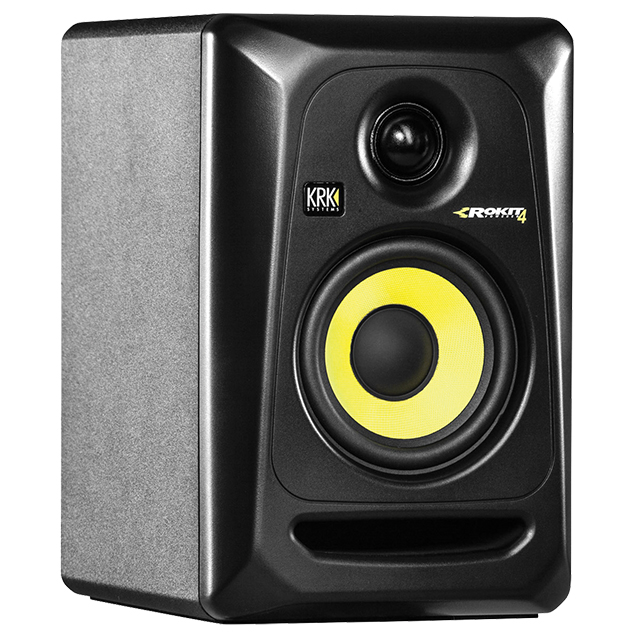
A monitor controller lets you easily cable-up multiple monitors, headphones, etc., and easily do A/B comparisons with the touch of a button. In my own studio, I have a set of JBL LSR2328P 8-inch, two-way studio monitors (since discontinued), as well as a set of KRK Systems Rokit 4 G3 monitors (reviewed previously for the magazine) that are paired with a studio subwoofer, an old Behringer Truth B2092A. While I would describe both sets as accurately rendering sound, the character of each is different, and I do find myself tweaking my mix to achieve a good balance of sound that’s more optimized than relying solely on one or the other.
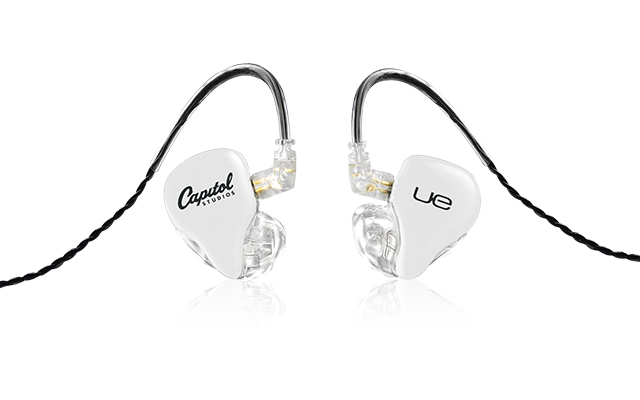
I also always check my mixes using a pair of Ultimate Ears Pro Reference Remastered in-ear monitors (reviewed previously for the magazine). These amazingly flat IEMs give yet another perspective on any given mix, and again, I find myself making tweaks based on what I hear.
I think my mixing is getting better with three checkpoints as part of my process, and it’s made possible by the monitor controller I chose: The PreSonus Monitor Station V2. On the input side, I can connect two pairs of inputs, and I chose both the master outs and a secondary set of outs from my Steinberg UR44 audio interface (reviewed previously for the magazine).
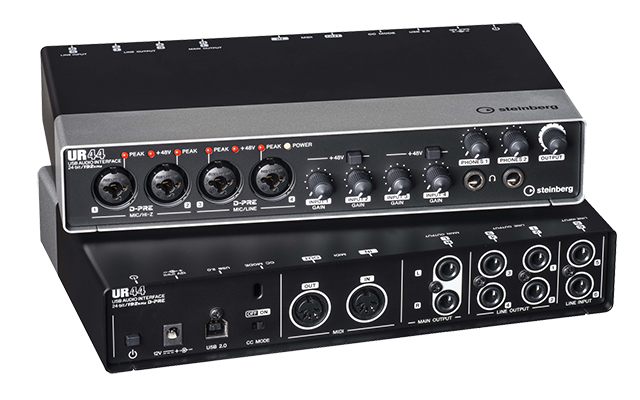
This allows me to switch back and forth between two profiles from the UR44—one for mixing, one for vocal recording—and switch the choice easily with the Monitor Station. When listening back, I can choose between any of four headphones (I use three; one for the IEMs, and two pairs of studio headphones), either for monitor recording, or checking mixes. The big volume control on the Monitor Station makes it easy and convenient to adjust levels, and I like the LED segment style VU meter as well. The unit is compact, and doesn’t take much valuable studio desk space.
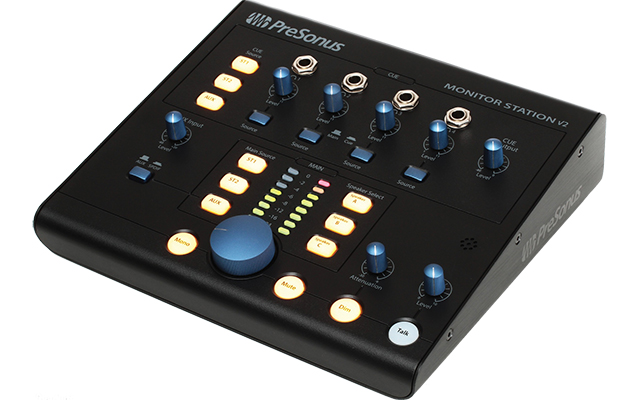
While some features of the Monitor Station V2 are not of use—such as a talk feature that would be used to communicate with musicians in a traditional studio—I did find the signal-routing flexibility to more than justify the roughly $300 street price of the unit.
Patch Editor/Librarian
This one is for the hardware-synth guys and gals among you — from all appearances a growing group of folks.
Back in late 2015, I purchased a Dave Smith Instruments Sequential Prophet-6 synth after reviewing it for the magazine, and I’ve been having a blast with it. But not surprisingly, editing sounds on the hardware can be a bit cumbersome and extremely time-consuming sometimes, and analyzing how the DSI team and others programmed the factory and add-on sounds can be all but impossible. That’s where a patch editor and librarian comes into play.
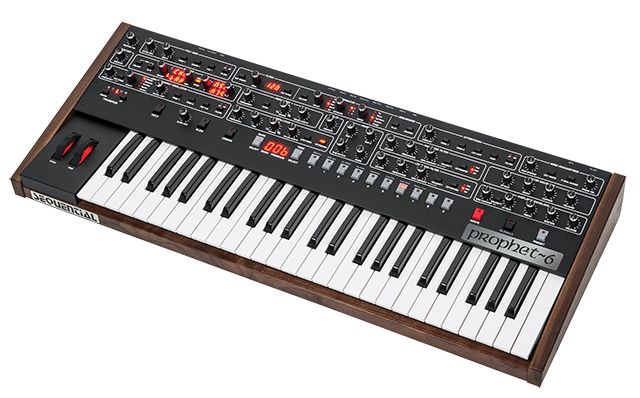
If you’re not familiar, patch editor/librarians are computer applications that enable you to deal with patches, including creating libraries of them, from your computer vs. hands-on with the hardware synth.
Dave Smith Instruments doesn’t make the software itself, but directs its customers to another company, SoundTower, who has made a business of figuring out these things for a range of synths not only from DSI, but from Korg, Moog, Roland and several others. In their editor for the Prophet-6, not only can you load and analyze (and use) the programming of the factory sounds, but you can tinker with settings interactively. It even goes beyond that. While the names and sound types of patches aren’t shown on the display of the hardware, the software knows them, and they’re displayed within the application, making it easier than ever to find sounds by category (e.g., organs, keys, bright lead, etc.) – really slick.
The librarian aspect comes into play by making it simple to save sound collections off to the disk of the computer, and retrieve them later when desired. This allows you to essentially configure the instrument as you might want it for a particular gig, save it off, and be able to bring it back any time you need it.
SoundTower’s Prophet-6 sound-editing software is powerful, but it requires a bit of ramp-up time to figure out how best to use it, and what all it’s capable of. A manual is not provided for the Prophet-6 editor specifically, but the company does provide them for some of the other editors offered, and the major capabilities can be learned by examining one of them; the general capability set and approach is virtually the same between their various editors it would appear. I did find the user interface to be a bit cumbersome and dated looking as well, making that learning process just that much more difficult. But for the investment of $69 and that learning curve, you get you a powerful workflow enhancement in exchange.
Even if you don’t own a Prophet-6 specifically, exploring editor/librarian options for your own hardware synths will pay dividends in both sound design efficiency and bringing order to your synth configurations.
Portable Audio Interfaces
In recent years, laptop computers have become powerful enough and reliable enough, and can be equipped with enough storage, to make them viable choices as studio computers. I’ll be covering the issues of laptops-vs.-desktops for the studio in a review scheduled for DJ Times in the months ahead, but currently, I still use a MacBook Pro laptop as my studio computer, and have found it to be more than up for the job. Using a laptop also gives me the advantage of working on projects on the go.
What I can’t take with me, however, is my usual audio interface, the aforementioned Steinberg UR44. You can, of course, just use the built-in audio capabilities of the laptop, but it can involve sacrificing audio quality, as well as providing non-optimal ways of connecting to external speakers when needed, or doing things like recording a vocalist or instrumentalist remotely. To solve those problems, I recently researched more portable pro audio interfaces, and decided to take the affordable iRig Pro Duo from IK Multimedia for a spin after seeing its little brother (iRig Pro I/O) debuted at the NAMM Show earlier this year.
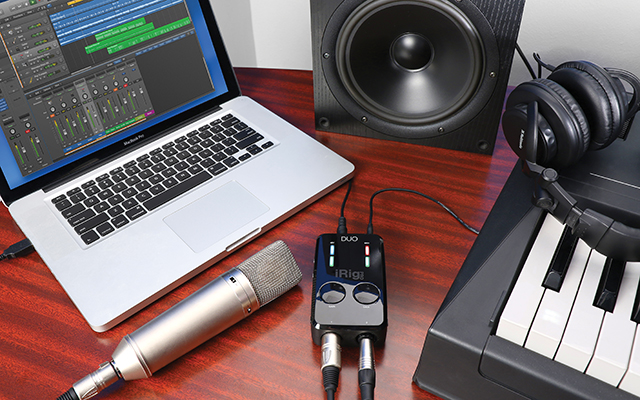
That “little brother” unit has a single mono input and headphone output, and is even more compact and portable. But the iRig Pro Duo is slightly bigger, delivers even more capability and, for me, is sort of the minimum entry point. It sports dual Neutrik inputs for ¼-inch and XLR connections, and a pair of balanced ¼-inch outputs, along with a headphone jack. MIDI input and output is also provided, as is the ability to enable 48V phantom power on the inputs to drive typical studio condenser mics.
In short, it provides two ins, two outs, headphone monitoring, and all the stuff you need for pro recording or mixing on the go. Roughly the size of a couple of standard decks of playing cards, and maybe weighing about the same amount, the iRig Pro Duo provides not only connectivity to your computer, but to your iOS or Android device as well, delivering even more utility and flexibility — and workflow benefit.
The two AA batteries that power the unit provided extremely long life (well, the first set still hasn’t worn out), and I loved the freedom to work on pretty much anything I wanted to, pretty much anywhere my laptop will take me. I used the iRig Pro Duo to do some mix work during a recent airline flight, captured some found sounds in the field, and recorded vocals in one of my friend’s clothes closets. I also tinkered around a bit with GarageBand on my iPad Pro with the iRig Pro Duo connected, and as expected, it worked great. And with a price point of just around $200, it was an affordable way to be more productive on the go, and proved — to me, anyway — that having a decent portable audio interface to throw in my laptop bag is a must-have item.
USB Microphones
In my home studio, I have a vocal recording set-up with a conventional condenser mic on a stand, appropriate sound control apparatus, and even a set of headphones that rest on a hook on the mic stand when not in use. The mic is, in turn, connected to an old-school channel strip, and into my audio interface. It’s a great set-up when I need to record serious vocals, but it’s always been cumbersome if I just need to record a quick scratch vocal for the real vocalist, or perhaps hum or sing a melody into Ableton Live (the DAW I used for many of my projects) specifically for conversion to MIDI.
Firing everything up for those utilitarian needs always seems a bit tedious, when what I’d prefer to do is just sit in my chair, at the computer, and do the deed. It seemed that a desktop USB mic might suit the purpose — without taking-up too much desk space in the process. Enter the Neat Microphones Beecaster desktop USB microphone.
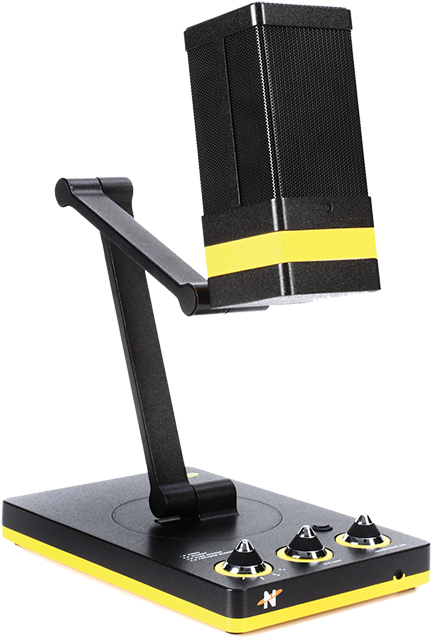
The Beecaster has a sturdy base about the size of a small paperback book, and sports an arm that connects the business end of the unit to that base. The arm lets you raise and lower the mic height, while rotating it side to side as well. It seemed like the perfect solution, and indeed it’s proven itself to be.
The Beecaster is a versatile little mic and, as the name suggests, it’s targeted primarily to podcasters and voiceover users. While not of value in my particular use of the mic so far, there is a headphone jack and volume control in the Neat Beecaster for real-time monitoring during recording. But with its switchable sound pickup pattern (mono, stereo, wide and focused), it seems to fill several different potential needs. Indeed, the manual — which cleverly and amusingly amplifies the bee theme — gives specific suggestions on how to configure the mic for everything from that primary use (podcasting/VO) to lead vocal recording to instrument recording of various flavors.
Tempted to see how well it’d work for lead vocals, I tried a few takes for a project I’m working on, and the results were surprisingly good. Obviously, without the channel strip inline to perform some compression and EQ, it was necessary to do more signal processing in the DAW, but that’s not atypical to begin with. With the desktop design, setting it up for a proper vocal or instrument recording would involve some jury-rigging since there’s not a way to put it on a mic stand. And given its street price of about $350, it might be a little steep for my primary use. But given the extra utility it brings to the table, I’ve grown rather fond of having it in my toolkit.
Conclusions
Productivity and workflow enhancements come in various shapes and sizes, and occasionally in unexpected places. With the wide range of music products available today, sometimes it just takes a little broader thinking to find ways to apply what’s out there to the specific workflow challenges you might experience in your own home studio. Hopefully, these ideas have sparked a few of your own.


